 |
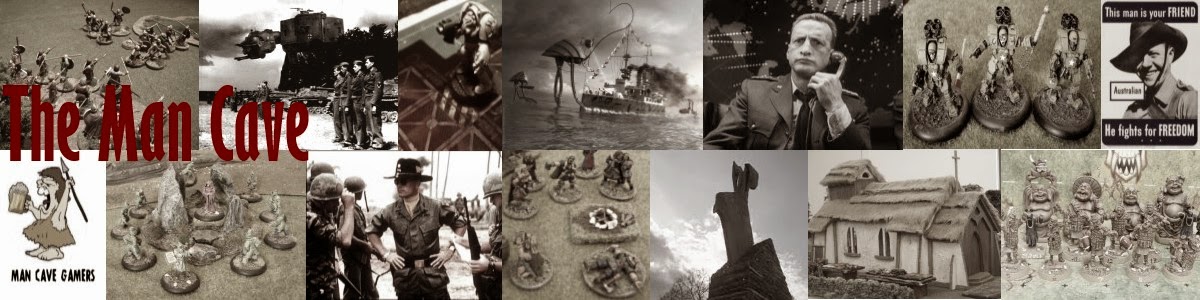
| A KS1 Nayk Mecha advances cautiously through a village during the 1948 invasion of Hokkaido. |
http://sites.google.com/site/martinsmodels/the-models/nayk-spider-mech-tank
The Ultimate Eight-Legged Freak
Welcome Comrades, to this exclusive look at the Motherland's latest and greatest weapon in the Great Patriotic War against the Fascist Hitlerites: The mighty Nayk Spider Tank!
The Nayk is one of the latest additions to the amazing collection of weird and wonderful models from Westwind Productions. The biggest Allied vehicle yet released for wargaming in the Secrets of the Third Reich setting, I picked up mine from Westwind's Australian distributor, Little Soldiers. (Which should come as no surprise, seeing I own the company!!!)
Right then, disclaimer out of the way, let's see what comes in this big box...
Thousands of Parts! No, hang on...
I won't deny that I had expected to open my Nayk kit, and discover the scaled-down equivalent to a warehouse at Tankograd waiting inside. Instead, I found a small bag of while metal detail parts, and a grand total of just four resin castings. My first reaction? "Where's the rest of this thing!?!"

But, once I'd gotten used to the idea, I realised the relative lack of components is an absolute blessing. True, the eight legs are, essentially, 'fixed' in their poses, and damned tricky to re-position, (involving a lot of cutting, sawing, filing, bleeding and cursing, I'm sure,) but they are as sturdy as you could possibly want. My suspicion is that if the legs were done as separate castings, to be glued together at the joints, the model would have some real issues with the weight loading on each joint; but by casting the legs on each side as a single piece, the model is 'braced' and the load is carried effortlessly.
The resin castings themselves are very clean and sharp. I think I found a total of three small air bubbles throughout, and none larger than about 0.5mm. Joy!
I left the castings out in the sun for a few hours, on a moderately warm day, to ensure any uncured resin or catalyst 'boiled' off. If you live in a country where the sun has been banished from your skies, you may need to put in a few minutes with a hairdryer to achieve a similar result. The castings were then vigorously scrubbed with hot water and detergent to ensure any mould release agent was removed.

One think I didn't like about the castings is this dirty great lump of resin poking out the bottom of the hull. I'm not sure if its there because of the need to get a substantial weight of resin to force the material all the way down to the knees, or if its to give the finished model something extra to sit on, but I decided to remove it from mine, which did require a lot of cutting, sawing, filing, bleeding and cursing. You have been warned!
All the metal components except the commander half-figure were superglued in place, while the legs were attached with 5-minute epoxy. I then thoughtfully left the model alone for 24 hours for the glue to cure completely. (Actually, I was distracted by something shiny, and forgot about it...)
Right then, out with the airbrush!
Rather than try to explain all the details of how I painted the Nayk, I would like to suggest, dear reader, that you follow this link to the lair of modelling arch-genius Fichtenfoo. Here you will find the details of a technique I had never tried before, but looking at the results he achieves, well, how could I not have a go myself? Scroll down to "12.12.08 >> Time for another blog article!" and follow the simple instructions. Brilliant, that's what it is!

All the colours you see me using here are from the Vallejo range. I have mostly used the Game Colour selection, which I find more than adequate for just about anything I need. I have, however, deliberately lightened the colours slightly, with a touch of Dead White (regulars will know how I love that colour,) to help it look a little faded.
Something else I love is Mr. Hobby Spray UV Cut Super Clear Gloss. Once I was satisfied with my Nayk's overall green, I shot the whole thing with this gloss varnish. Now I had the perfect surface for some 1/48 scale Russian armour decals, donated by an unsuspecting plastic kit. More Super Clear Gloss to seal the decals, and back to Fichtenfoo's, hairspray and salt technique before the whitewash was sprayed on.
Seriously, I don't think its possible to hand-paint a finish like this. The sheer randomness that is dictated by the salt crystals makes this a real joy, and if you think you've gone too heavy-handed at any step, just wash the whole model off, and you're back to the stage before you last applied the hairspray! It's like having a command-Z function for modelling!!!

Once I was satisfied with the overall finish, I shot more Super Clear Gloss, followed by good ol' Testors' Dullcote. The commander was painted up using the usual figure painting techniques, and glued to the cupola. (Unfortunately, he sits on top of the cupola, not inside, but I think he still looks pretty good up there.)
Citadel snow was added to the legs' bases, (its not Russian unless there's snow, right?) and, even if I do say so myself, job's a good 'un.
I'm working on a second Nayk right now, but I'm still searching for a colour scheme... straight factory red undercoat? Obscure Russian camouflage scheme? Or maybe a captured German Nayk, in Hinterhalt-Tarnung (ambush scheme) ?


And finally some basing notes from Heresy Brush
http://www.heresybrush.com/2011/como-hacer-peanas/
No comments:
Post a Comment